Why buy from FenceForPontoon.com
Complete Pontoon Fence Packages, Classic & Premium Styling; all Made in the USA
Don't Replace, Re-New your Pontoon with our Fence Packages or Paneling
Fence Pieces, and Parts to Fix or ReNew your Pontoon
Helpful information, instructions, & our company policies
If you have shipping damage
If you have shipping damage
Item content
We occasionally run into problems and we’d like everyone to understand what our policies are.
Shipping Damage– We usually ship via FedEx. Replacement rolls of paneling as well as whole fence packages or parts. Shipping damage has been an issue for eight years. We’ve gotten pretty good at packaging but when a driver throws aluminum off a truck onto a concrete driveway anything can happen. You’ll recognize a crushed corner on a box or puncture in a paneling right away. Often the driver will deliver and you may not be home. Contact us right away. We’ll usually ask for a picture, and e mail works best. Our policy is your satisfaction 100% guaranteed so don’t worry.
Damage to a Roll-Our usual policy is to replace the entire roll, usually shipping the next day. However there may be instances where the customer can salvage the damage roll. If you’ve got a 24” tall panel and you’re going to cut it down to 18”, damage on the top few inches might not matter. Replacement shipping will cost us money, sending the new one and returning the old one. We usually offer customers a discount if they can work with the damaged coil. Sometimes the damage can be cut away as scrap and you get a discount.
 Damage to the top corner of the panel roll. Sometimes you can cut down that end and still have enough to do your pontoon boat.
Damage to Fence– Like paneling our policy is your complete satisfaction. Fence usually needs to be replaced when damaged but there are instances when it can still be used if the damage is slight. Scratches or blemishes on the inside panel that may be covered by furniture could be acceptable. It’s always up to the customer but we have costs in shipping and returning replacement pieces so a discount is usually available.

Ordered Wrong, Shipped Wrong- We don’t have many problems with items shipped wrong but do seem to have a few problems where complete packages are ordered wrong or the customer wants to change something. It’s not really a problem for us. Our fence is assembled from components so if you want to switch 24” gates for 28” gates, we just ship the bigger gates and put the smaller ones back in stock. If you change your mind on something there may be some additional shipping for the switch but we keep it reasonable, at our cost.
Returns-Occasionally a customer will end up with a piece of fence they don’t need. We will restock it and refund your purchase price but you must pay the return shipping. If this happens, contact us and we’ll help with the return shipping costs. Shipping a large piece of fence is expensive, but we receive the best rates. You’ll still have to pay our costs but instead of the cost of shipping from a Fed Ex/UPS store, we’ll get you our good rate and it will save you money.
How our fence railings are made
How our fence railings are made
Unlike the new boat manufacturers, we use a more simplistic approach to fence building. The manufacturers use a large half a million-dollar machine that bends each corner with the panel in the rail. This allows for a smooth seamless corner that we try to come close to matching. However, on our corner pieces you may see where our panel sits a little bit out from the fence rail. We have our fence components built ahead of time and slide in the panel color of your choice. Your fence is then sent through a pinch roller machine that bends the aluminum lip down securing the panel to the rail. We also use L shaped edge protection to keep even the littlest boaters safe while on the water. This may require you to drill out the holes to secure each panel to each other but we feel safety outweighs the slight inconvenience to you during the install process. We strive at to offer a quality product at a fraction of the price of the fence purchased from the new boat manufacturers.
Installing our fence packages
Installing our fence packages
How to Install Your Fence Package
Part quantities will vary depending on the fence package that you purchase
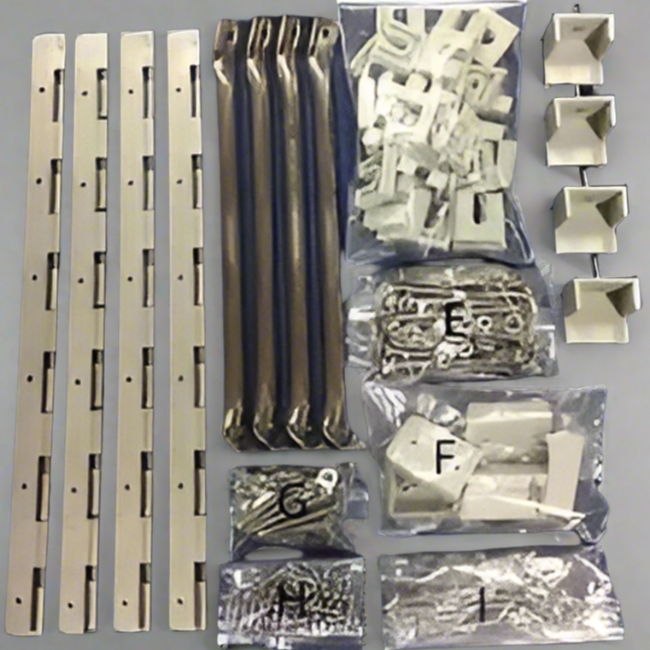
Standard Hardware Kit:
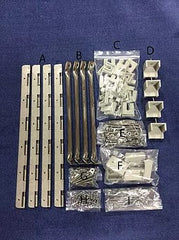
A- Lift-Lock Slip Hinges
B- Stainless Steel Fence Braces
C- Fence Riser Kit (pack of 26)
D-Universal Gate Stops
E- Fence Bolt Kit (pack of 26 stainless steel)
F- Pinch Guard Kit
G- Fence Brace Attachment Bolts
H- Self Tapping Screws for Hinges
I- Fence-to-Fence Attachment Bolts
Tools Needed:
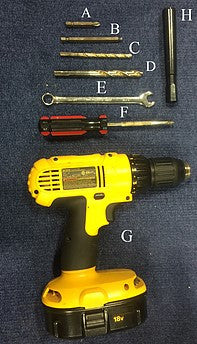
A- Phillips Drill Bit
B- Square Drill Bit
C- 1/4" Drill Bit
D- 3/8" Drill Bit
E- 7/16" Wrench
F- Phillips Screw Driver
G- Drill
H- Marker/Pen
If you are starting with fence over a newly carpeted deck, you don’t necessarily have to put the new fence where the old was. You have the option of leaving a deck in the back for gas tanks to sit outside the fence or to increase or reduce the deck in the front. First you’ll want to bolt the individual sections together and install the gates, then sit the fence on your deck. The 32” long radius piece goes across the 8’ section of the deck. (identify the left from right) Your fence will be 92” wide (32” Corner, a 28” gate, and another 32” corner). Our fence is generally but not always pre-drilled. The stern gate is NOT pre-drilled so that you won’t have to choose a specific gate for the rear. The stern gate on regular fence packages is not intended to be used as a gate, but as a filler piece. Simply drill the gate and corner pieces to place two fence to fence bolts per side to hold it in place. The 92” stern piece in the square stern groups are NOT pre-drilled, because we’ve had difficulty when individuals use the wrong piece, and not noticing until it was to late.
There is no “right or wrong” way to install the fence. Once you’ve positioned it where you want, mark where the holes will be in the carpet, it’s easiest to use a punch or something to score the carpet using the holes in the fence as a pattern. If you chose to drill the floor holes from the fence be careful not to scar the fence paneling with the drill. The washers for the fence bolts go on the bottom. If you have a floor plan that has a rear gate, it should be bolted in place so that it won’t open. This gate is a filler piece and should not open, thus we do not send a hinge or gate latch, but we have included 4 bolts (2 on each side). This gate is NOT DRILLED, so you don’t have to select a specific gate for the back. Fence braces generally do the most good near the gates. Give some consideration to your furniture group so that a fence brace doesn’t interfere with seating.
INSTALLING SUNDECK PADS
Installation of the Sundeck Cushion
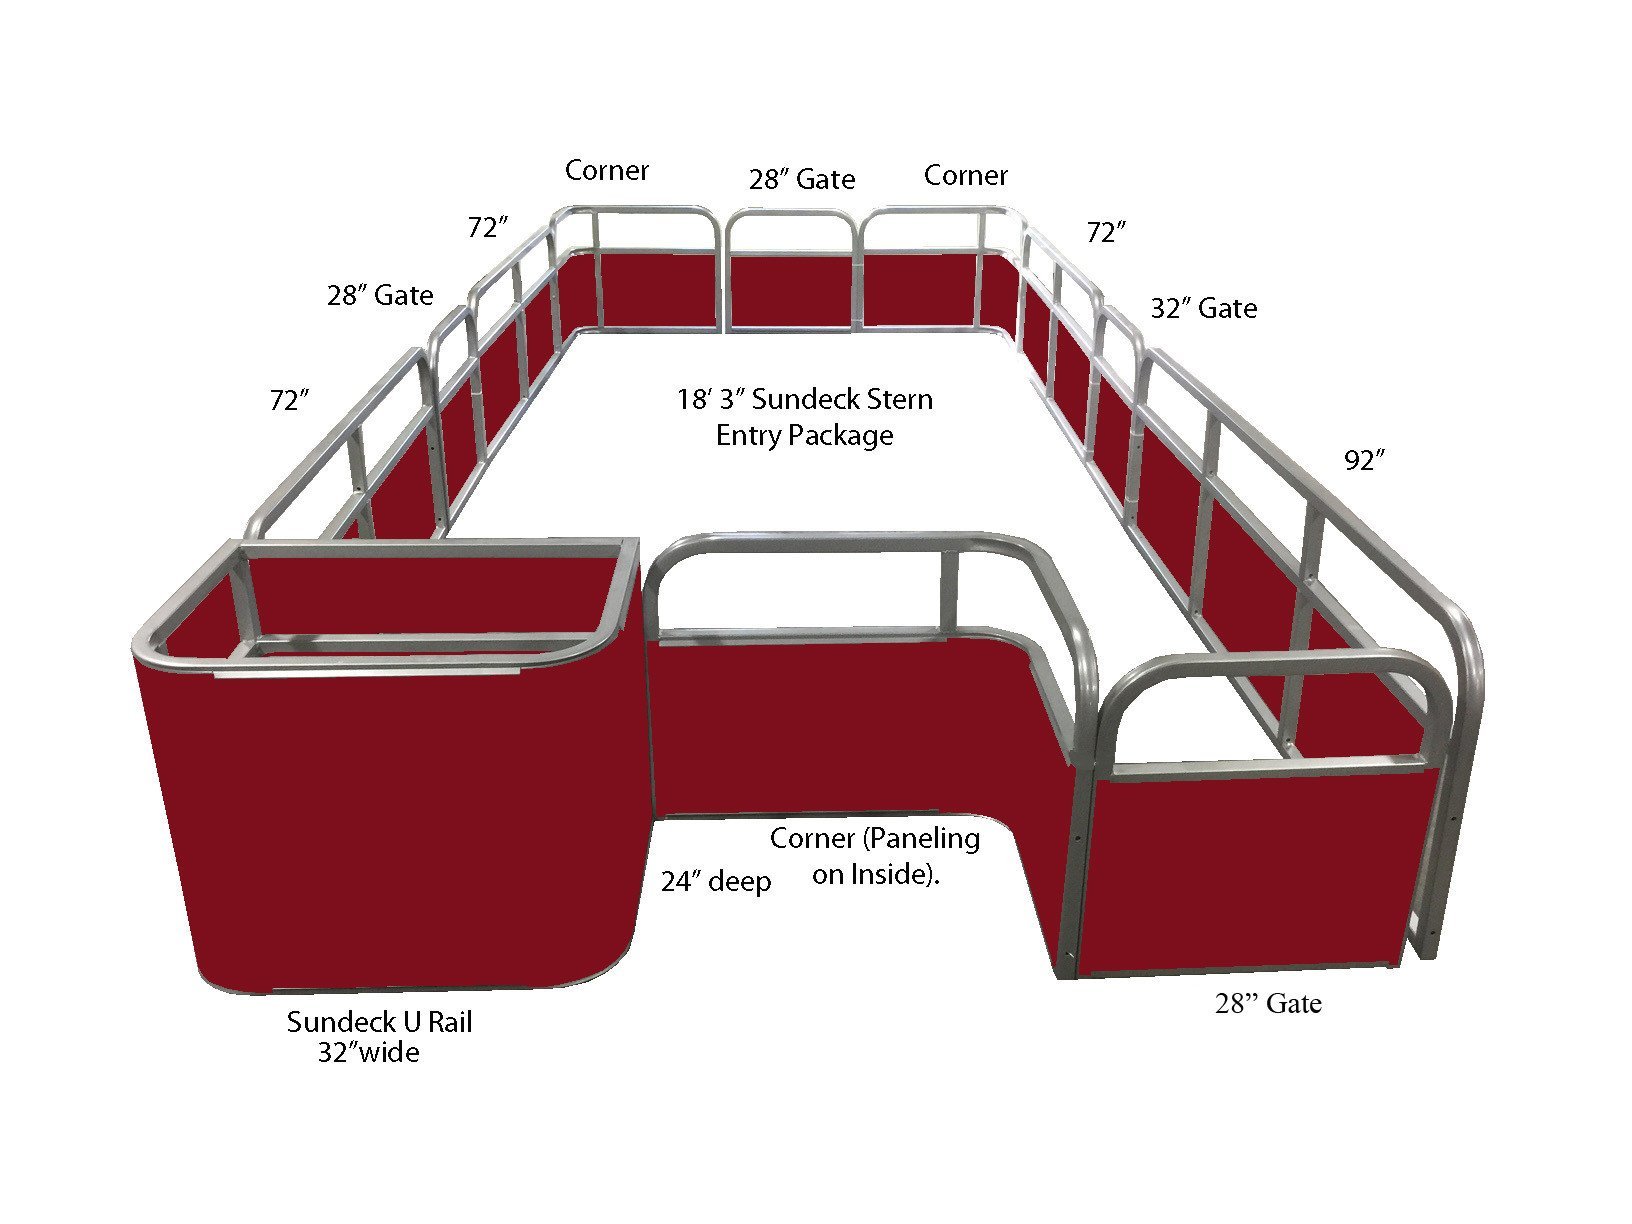
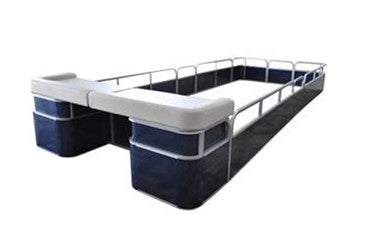
The Full Sundeck packages from FenceforPontoons.com includes two comer pads and a rectangle center pad. The Stem Entry Sundeck uses the same pads except it only has one comer pad for the left rear of the pontoon boat. The following instructions are for installing those pads. Your regular Sundeck comes with the following parts.
3- Piano Hinges, use one per pad to allow the pads to be lifted up. 2-Gas Struts with mounts
2-Gray Plastic clips
Step 1. Start by laying the pads across your sundeck. Once you have the fit desired for your cushions you can begin the installation process.
Step 2. Starting with the center cushion, install the piano hinge on the back of your fence closest to the interior of your pontoon boat with the provided self-tapping screws. This will allow for the center cushion to be lifted out of the way when tilting your motor up. Install the plastic clips to the back side of the center cushion to lock the center cushion in place on the interior sides of the U style comer fence.
Step 3. The side cushions install with the hinge on the top of the Sundeck U rail on the very back of the pontoon boat (away from the interior). Once the hinge is mounted on the rail, screw the hinge into the cushion. Install the Flat ball mount on the inside of the Sun-Deck U towards the back. The Angled Ball Mount gets mounted to the cushion.
*Important note. The gas strut must be mounted so that it is completely flat when in the down position. Otherwise the cushion will want to lift back up.

Sundeck cushion installation
Sundeck cushion installation
Installation of the Sundeck Cushion
The Full Sundeck packages from FenceforPontoons.com includes two comer pads and a rectangle center pad. The Stem Entry Sundeck uses the same pads except it only has one comer pad for the left rear of the pontoon boat. The following instructions are for installing those pads. Your regular Sundeck comes with the following parts.
3- Piano Hinges, use one per pad to allow the pads to be lifted up. 2-Gas Struts with mounts
2-Gray Plastic clips
Step 1. Start by laying the pads across your sundeck. Once you have the fit desired for your cushions you can begin the installation process.
Step 2. Starting with the center cushion, install the piano hinge on the back of your fence closest to the interior of your pontoon boat with the provided self-tapping screws. This will allow for the center cushion to be lifted out of the way when tilting your motor up. Install the plastic clips to the back side of the center cushion to lock the center cushion in place on the interior sides of the U style comer fence.
Step 3. The side cushions install with the hinge on the top of the Sundeck U rail on the very back of the pontoon boat (away from the interior). Once the hinge is mounted on the rail, screw the hinge into the cushion. Install the Flat ball mount on the inside of the Sun-Deck U towards the back. The Angled Ball Mount gets mounted to the cushion.
*Important note. The gas strut must be mounted so that it is completely flat when in the down position. Otherwise the cushion will want to lift back up.

Our Privacy Policy
Our Privacy Policy
FenceForPontoons.com will never sell or share your information.
As described in our Privacy Policy, we collect personal information from your interactions with us and our website, including through cookies and similar technologies. We may also share this personal information with third parties, including advertising partners. We do this in order to show you ads on other websites that are more relevant to your interests and for other reasons outlined in our privacy policy.
Sharing of personal information for targeted advertising based on your interaction on different websites may be considered "sales", "sharing", or "targeted advertising" under certain U.S. state privacy laws. Depending on where you live, you may have the right to opt out of these activities. If you would like to exercise this opt-out right, please follow the instructions below.
If you visit our website with the Global Privacy Control opt-out preference signal enabled, depending on where you are, we will treat this as a request to opt-out of activity that may be considered a “sale” or “sharing” of personal information or other uses that may be considered targeted advertising for the device and browser you used to visit our website.
How to Install new Fence Paneling
How to Install new Fence Paneling
Read over these step-by-step suggestions to help replace your old dented or scratched aluminum paneling with our new paneling!
Step 1: Remove any screws or pop-rivets that attach the damaged aluminum to the railing.

Step 2: Using a flat scraper, pry open the lips that pinch the aluminum paneling to the rails. Make sure to do this along the whole rail section.

Step 3: Using a rubber mallet, knock out the damaged paneling section.

Step 4: Apply foam tape beneath the lips of the railing. The foam tape keeps the paneling from vibrating against the rails.

Step 5 & 6: Measure and score the aluminum paneling to the size that you need to replace.


Step 7: Place the scored piece on a sturdy edge, and bend the aluminum back-and-forth until the aluminum breaks apart.

Step 8: Apply the double-sided fence tape on the ends of the rails. Make sure to press firm on the tape, and clean the area before hand with rubbing alcohol for a firm adhesion.

Step 9: Slide the new paneling in-between the lips of the rails.

Step 10 & 11: Remove the backing to the fence tape, and pound down the lips of the rail using a rubber mallet. Slowly work across the lip back and forth, bending a small amount at a time to keep it looking even.


Finished Gate after replacing the damaged aluminum paneling.

*In some cases, using a lubricant such as WD-40 may need to be used so that the paneling will slide between the rails. Make sure to wipe all the excess lubricant after installation so that it won’t eat away the powder coat finish on the rails.
How to determine the fence railing package that best fits your pontoon.
How to determine the fence railing package that best fits your pontoon.
Item content
How wide and how long is your pontoon boat deck?
90% of the pontoons built before 2008 were 96” (8’) wide. But, just to be sure measure the width, some older Crest and JC pontoons were 8’6”. How long is your deck? Not the pontoon tubes, but the deck. Decks are usually sheets of 4’ wide plywood and are often 12', 16’, 20’ or 24’+. The length of the deck determines the length of your fence.
Pontoon Deck Size
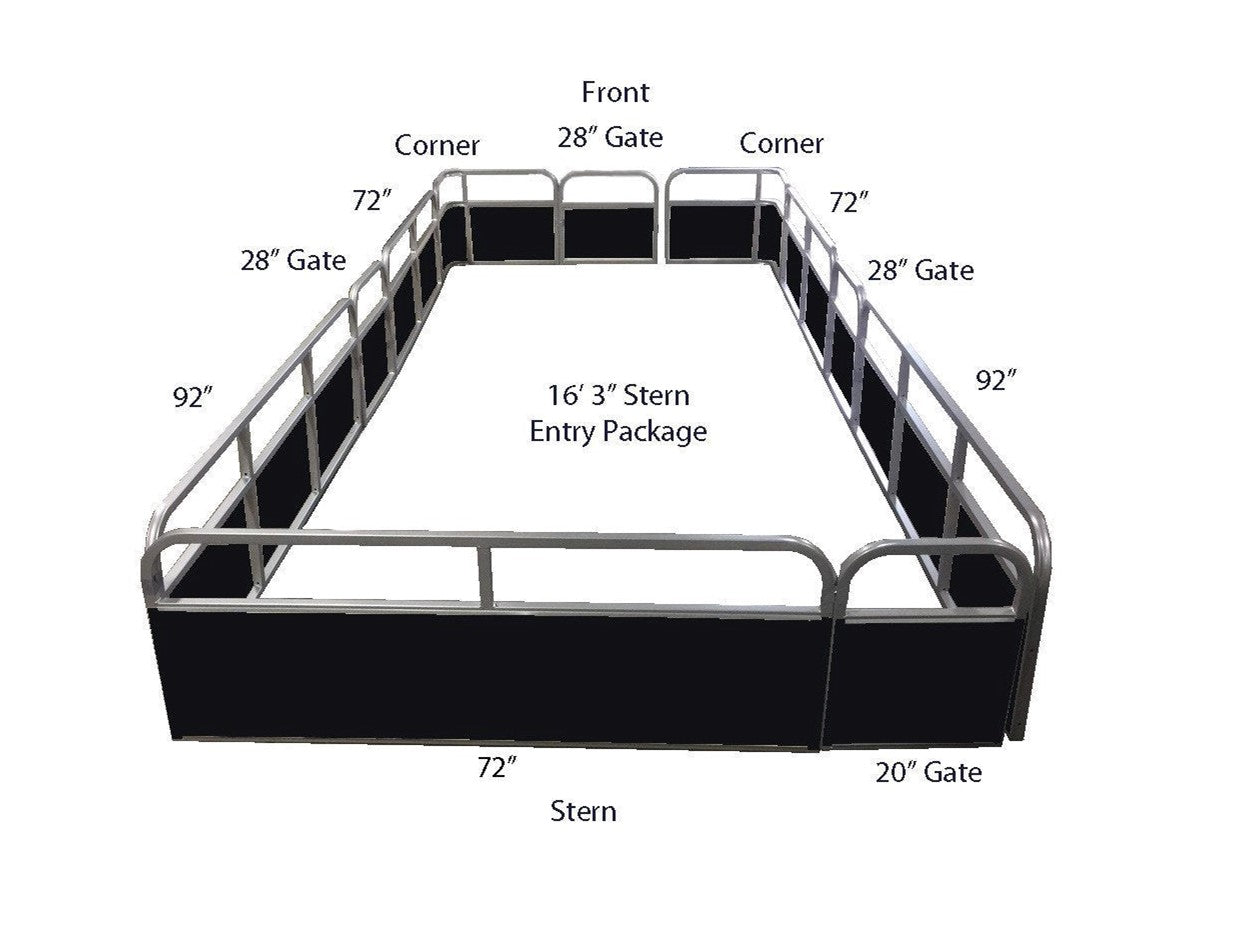
Our fence is modular and can be bolted together in varying lengths but the widths are generally limited to 8’ or 8’ 6”. Our fence packages are approximately 93” or 99” wide.
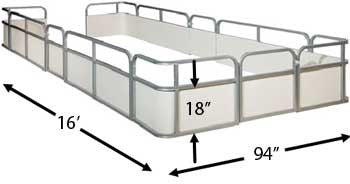
If you are putting a new fence playpen on an old boat, don’t be constrained by the layout of the old fence. Modern boats have larger stern seating areas with less seating in the bow. Design your new playpen with the side gates further forward to allow more seating in the stern. If you have special needs like a wider gate for a wheelchair, we can handle it.

Pontoon Fence Paneling
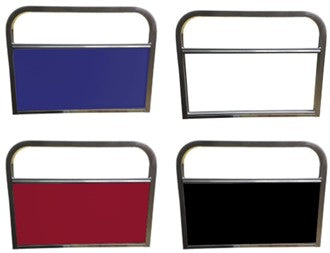
Paneling on the outside Paneling on the inside


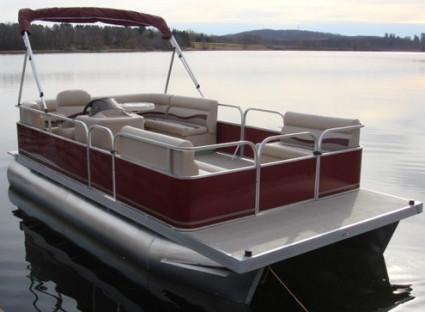
We can build your new pontoon fence in either configuration. Modern boats have the paneling on the outside, which gives you more options for graphics. But the fence is more susceptible to scratching or damage. Most of the older boats had the paneling on the inside. If you are trying to match or replace pieces of pontoon fence on an older boat you’ll probably want the paneling on the inside.
Damaged Pontoon Boat Railing

If you’re trying to replace a damaged section it’s often necessary to replace both the port and starboard sections, even though one side may not be damaged. Work from the gates forward (or backward).
What if the size I need is not one you offer?
We are not a custom manufacturer. If you can-not assemble the configuration of the pontoon fence you want from out stock pieces, we unfortunately cannot help.

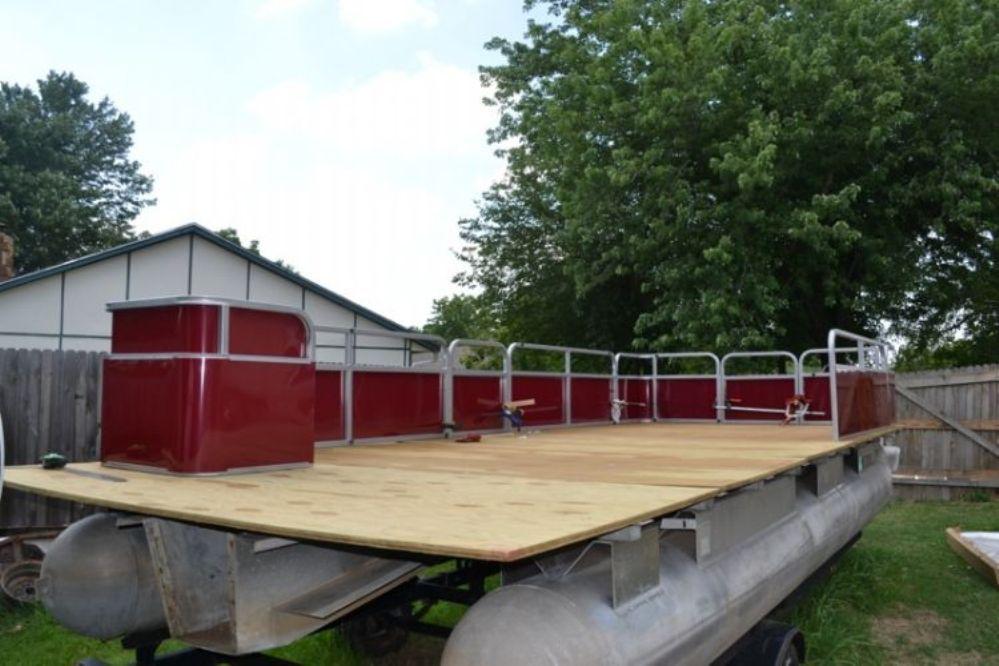
This older boat has a stern area of only about 6’ behind the side gates. There is no room for seating in the stern. Yet, there is a large open deck in the bow, almost 5’. By inserting a fence section behind the side gates, you could have a much larger interior playpen. Pontoon railing example
If you wish to increase the length of your playpen, you can add sections in front or behind the side gates. Move the old fence forward to reduce the front bow area. These are the first four things you’ll want to decide about your new fence. Width and length, Paneling on the outside or inside, and what color fence paneling.
IMPORTANT STATEMENT
It is the responsibility of the installer to mount and secure replacement pontoon fence in a safe manner that conforms to Coast Guard and local safety standards. FenceforPontoons.com supplies only general guidelines as to how replacement fence should be installed. Generally, our fence is sold to replace old pontoon fence. If the old fence was installed properly, the new fence should be also. But, it is up to the installer to make certain that it is installed safely, with no loose parts, sharp edges, etc. Safety pinch guards (supplied) must be installed on gates.
FenceForPontoons.com is not responsible for fence improperly or unsafely installed.
Our Shipping Policy
Our Shipping Policy
All orders over $100 ship for Free

FenceForPontoons.com proudly ships via FedEx Ground.
- All orders containing fence parts and paneling usually ship the same day from Elkhart, IN as long as they are ordered before 2pm Eastern time.
- Fence Gate Orders usually ship within 4-10 business days, as we build the fence to order.
- Full Fence Packages are built to order in our facility at the time of order. Full fence packages are built in the order that they are recieved with most orders shipping out with 2-4 weeks from the date of order. Occasionally during the busy rebuilding season (October-November & April-May) order may take slightly longer.
- If you have questions on current build times please just give us a call or email and we will provide you with our current lead times.
- If your order arrives and appears to be damaged, do not throw away the damaged packing material. Contact us via phone (877)294-3395, or Email at Sales@pontoonfence.com right away. We will have FedEx pick up the damaged fence and resend your order within 48 hours.
- If for some reason you are not completely satisfied with your new pontoon fence please let us know and we will make it right.
